Viosport Adventure Cam 3 review - part one
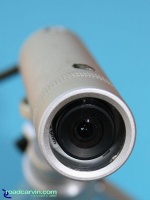
The Viosport Adventure Cam III is a compact, lightweight, high quality bullet camera suitable for use in a variety of action/sports settings. It features a Sony Ex-View CCD with 520 lines of resolution, a water-resistant housing with lens protector (or optional filters), and a coiled audio/video cord with integrated high-gain microphone.
I've had a chance to use the Viosport Adventure Cam III on several rides; here are my initial impressions and observations. I'll cover real-life performance and road-testing in subsequent installments.
Mounting options
(Note: I did not have access to the optional Viosport mounting kit at the time of my initial tests described here. The mounting kit will be covered in the next installment of this review.)
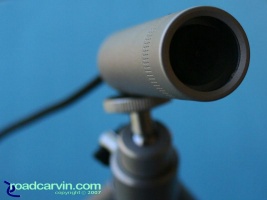
After receiving the camera and checking it on the target video camera, I wanted to attach it to my motorcycle and take it for a quick test on the open road. The mount included with the camera was not suitable for my purposes (see photo), so I rummaged through my bag of tricks for suitable mounting devices.
I wanted to mount the camera under the nose of the fairing just above the front wheel, and on my helmet, so I needed something that would allow secure mounting to a fairly flat area, and would provide adequate support for the camera.
Fortunately, I had an assortment of mounting tabs used in electronics projects. You may have seen them elsewhere: flat, square, plastic tabs with a self-adhesive backing, with a slightly curved surface and slots to allow insertion of zip-ties. (Similar tabs are included with the optional Viosport mounting kit.)
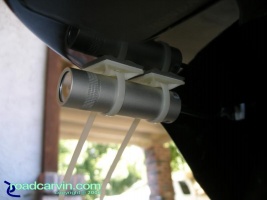
So, here's what I ended up doing. I mounted two of the mounting tabs inline under the nose of the front fairing.
Then, I secured the camera using medium nylon zip ties. This is not an elegant solution, because it does not allow quick removal and re-attachment of the camera, but it did allow me to place the camera precisely where I wanted it for the purpose of the initial test.
After mounting the camera below, I routed the cables up and through the fairing's opening for the front forks up to the fuel tank area, and secured the cables with a set of self-adhesive cable clips (again, available from any decent electronic hobby or supply house.)
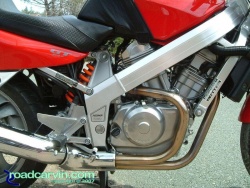
The remainder of the hook-up involves finding a power source (if you don't want to use the supplied 8 AA-cell battery pack), securing the multiple wires coming from the camera, and connecting them to the camera. (The camera connection will depend on your camera model, so I'll not cover them in this review.) I opted to connect the camera to the bike's 12V electrical system, which involved mounting a fuse-protected power socket in an appropriate location, then crafting a power cable with the appropriate connectors and polarity, and routing it from the battery to a convenient location near the camera. On my bike, I opted to run the cable under the bodywork and mount a female jack near the fuel tank, where it's accessible.
Getting focused
About five minutes into my initial ride with the Adventure Cam, the camera focus went out of adjustment - bad enough that the recording looked like there was coating of grease on the lens. It was so bad, I was afraid that I'd somehow damaged the camera. Upon return to the garage, a quick inspection revealed that the focus ring lock screws had backed out enough to allow the lens focus ring to vibrate out of the initial position.
Focusing the camera using the procedure outlined in the owner's manual requires the use of a large or high-resolution television or monitor in order to get an accurate read on the focus (viewing the camera output using a small LCD on a camcorder doesn't really help much - it may look clear, but the recorded image may be noticeably out of focus.)
So, be sure to check and set your focus before you hit the road. The focus procedure is a bit touchy, as the mere act of tightening the lock screws will shift the lens ring a bit - enough to throw the focus off. And, while I'm on the subject of focus, I need to mention that the focus lock screws are very small (as is the matching allen wrench) and I was concerned that I'll either strip the screws or damage the lens ring by over tightening - a delicate touch is required.
After contacting Viosport representatives, I found out that the foam collar behind the lens is intended to act as a simple retainer by putting pressure on the lens, thus preventing movement of the lens even if the lock screws are loose. In this case, it did not have the desired effect - perhaps due to higher vibration levels on the motorcycle. Older models used a metal spring to help retain the lens - I have received one of these springs from Viosport; I'll install it and report results in an upcoming installment of this review.
Sound check
Even though the camera was completely out of focus for most of the initial ride, I transferred the test video to my computer. The microphone seemed to pick up considerable wind noise, and the sound level seems to be excessively high - high enough that it is distorted and 'clipped' whenever the bike got over 25-30mph. The microphone was mounted next to the camcorder, behind the fairing just above the gas tank on the SportBikeCam mount, so it was away from any direct wind blast. According to Viosport representatives, the camera includes a high-gain microphone, and measures should be taken to prevent overloading the microphone. I'll experiment with various solutions and report my results.
Part one conclusion
The Viosport Adventure Cam III is a well made, high quality bullet camera suitable for mounting on your motorcycle or helmet. Be prepared to use creative mounting methods or purchase additional hardware to mount the camera to your helmet or bike. Be sure to check the camera focus before departing on your ride, and double-check the focus locking screws before each ride. Viosport support was prompt and courteous whenever we had questions about the product or needed assistance, on the few occasions where we needed help.
To Be Continued...
Current Poll
Recent Comments
About the author
Author Name
Michael Curry
Author Bio
Michael has been riding street motorcycles since 1975. He's owned and ridden everything from Hondas to Harleys with a preference for spirited sport-touring riding.
Michael is a Roadcarvin.com co-founder and serves as chief editor, scribe, staff photographer, and other things.
